- 자바 프로그래밍(com.eomcs.io)
  - 바이너리 파일 입출력 다루기(ex02)
바이너리 파일 입출력 다루기(ex02)
Byte Stream - 바이트 단위로 출력하기
Exam0110.java
package com.eomcs.io.ex02;

import java.io.FileOutputStream;

public class Exam0110 {

  public static void main(String[] args) throws Exception {

    // 1) 파일로 데이터를 출력하는 객체를 준비한다.
    FileOutputStream out = new FileOutputStream("temp/test1.data");

    // 2) 1바이트를 출력한다.
    // => write(int) : 1바이트를 출력하는 메서드이다.
    //    파라미터의 타입이 int라고 해서 4바이트를 출력하는 것이 아니다.
    //    오직 맨 끝 1바이트만 출력한다.
    out.write(0x7a6b5c4d); // 출력하는 값은 0x4d 이다.
    out.write(2);     // 0x00000002
    out.write(40);    // 0x00000028
    out.write(100);   // 0x00000064
    out.write(101);   // 0x00000065
    out.write(102);   // 0x00000066
    out.write(127);   // 0x0000007f
    out.write(255);   // 0x000000ff
    out.write('A');   // 0x0041
    out.write('가');  // 0xac00

    // 3) 출력 도구를 닫는다.
    out.close();
    System.out.println("데이터 출력 완료!");

  }

}
 1) 파일로 데이터를 출력하는 객체를 준비한다.
     - new FileOutputStream(파일경로)
     - 지정된 경로에 해당 파일을 자동으로 생성한다.
     - 기존에 같은 이름의 파일이 있으면 덮어쓴다.
     - 주의! 기존 파일이 삭제된다.
     - 파일 경로가 절대 경로가 아니면
       - 리눅스,유닉스: / 로 시작하지 않으면,
       - 윈도우: c:\, d:\ 등으로 시작하지 않으면,
       현재 디렉토리가 기준이 된다.
2) 1바이트를 출력한다.
=> write(int) : 1바이트를 출력하는 메서드이다.
파라미터의 타입이 int라고 해서 4바이트를 출력하는 것이 아니다.
오직 맨 끝 1바이트만 출력한다. 3) 출력 도구를 닫는다.
- OS에서 관리하는 자원 중에서 한정된 개수를 갖는 자원에 대해
여러 프로그램이 공유하는 경우, 항상 사용 후 OS에 반납해야 한다.
- 그래야 다른 프로그램이 해당 자원을 사용할 수 있다.
예) 파일, 메모리, 네트워크 연결 등
- 이런 자원을 사용하는 클래스는 자원을 해제시키는 close()라는 메서드가 있다.
- 보통 java.lang.AutoCloseable 인터페이스를 구현하고 있다.
- 이번 예제에서 다루는 FileOutputStream 클래스에도 close()가 있다.
- 따라서 FileOutputStream 객체를 사용한 후에는 close()를 호출하여
사용한 자원을 해제시켜야 한다.
- close()를 호출하면,
FileOutputStream이 작업하는 동안 사용했던 버퍼(임시메모리)를 비운다.
- OS에서 제공한 파일과의 연결을 끊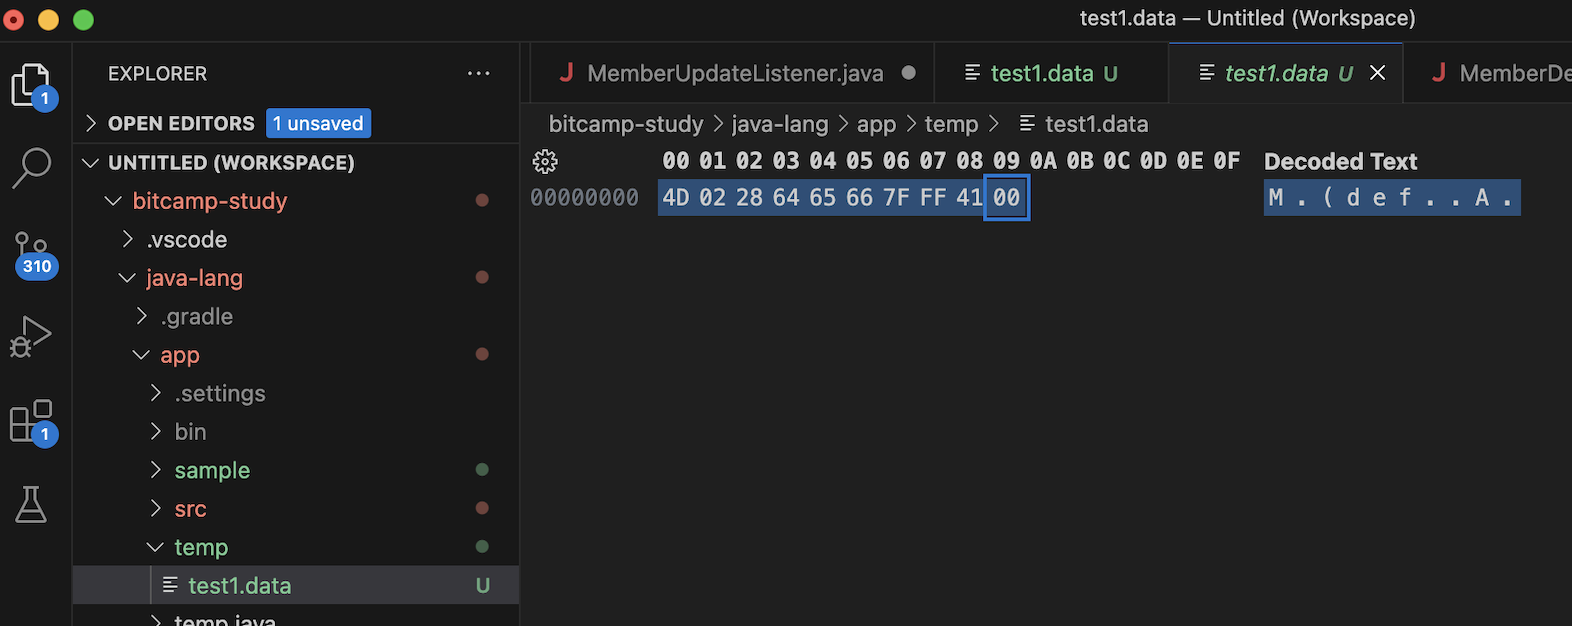
파일 입출력 API 주요 클래스 (java.io 패키지)
// 1) 데이터 읽기
// InputStream (추상 클래스)
//   +-- FileInputStream : 바이트 단위로 읽기 (binary stream)
//
// Reader (추상 클래스)
//   +-- FileReader : 문자 단위로 읽기 (character stream)
//
// 2) 데이터 쓰기
// OutputStream (추상 클래스)
//   +-- FileOutputStream : 바이트 단위로 쓰기 (binary stream)
//
// Writer (추상 클래스)
//   +-- FileWriter : 문자 단위로 쓰기 (character stream)

// ## 바이너리 파일 vs 텍스트 파일
// 1) 바이너리 파일
// - character set(문자표) 규칙에 따라 작성한 파일이 아닌 파일.
// - 기본 텍스트 편집기(메모장, vi 에디터 등)로 편집할 수 없는 파일을 말한다.
// - 만약 텍스트 편집기로 변경한 후 저장하면, 파일 포맷이 깨지기 때문에 무효한 파일이 된다.
// - 예) .pdf, .ppt, .xls, .gif, .mp3, .jpg, .hwp, .mov, .avi, .exe, .lib 등
// - 바이너리 파일을 편집하려면 해당 파일 포맷을 이해하는 전용 프로그램이 필요하다.
//
// 2) 텍스트 파일
// - 특정 character set(문자표) 규칙에 따라 작성한 파일.
// - 기본 텍스트 편집기(메모장, vi 에디터 등)로 편집할 수 있는 파일을 말한다.
// - 예) .txt, .csv, .html, .js, .css, .xml, .bat, .c, .py, .php, .docx, .pptx, .xlsx 등
// - 텍스트 파일은 전용 에디터가 필요 없다.
// - 텍스트를 편집할 수 있는 에디터라면 편집 후 저장해도 유효하다.

// 바이너리 데이터 읽고, 쓰기
// - 읽고 쓸 때 중간에서 변환하는 것 없이 바이트 단위로 그대로 읽고 써야 한다.
// - InputStream/OutputStream 계열의 클래스를 사용하라.
//
// 텍스트 데이터 읽고, 쓰기
// - 읽고 쓸 때 중간에서 문자 코드표에 따라 변환하는 것이 필요하다.
// - Reader/Writer 계열의 클래스를 사용하라.
Exam0120.java
package com.eomcs.io.ex02;

import java.io.FileInputStream;

public class Exam0120 {

  public static void main(String[] args) throws Exception {
    // 1) 파일 데이터 읽기를 담당할 객체를 준비한다.
    // - new FileInputStream(파일경로)
    // - 해당 경로에 파일이 존재하지 않으면 예외가 발생한다.
    //
    FileInputStream in = new FileInputStream("temp/test1.data");

    // 2) 1바이트를 읽는다.
    // => read() 메서드의 리턴 타입이 int 라 하더라도 1바이트를 읽어 리턴한다.
    //
    int b = in.read(); // 읽은 값은 0x4d 이다.
    System.out.printf("%02x\n", b);

    System.out.printf("%02x\n", in.read());
    System.out.printf("%02x\n", in.read());
    System.out.printf("%02x\n", in.read());
    // read() 를 호출할 때마다 이전에 읽은 바이트의 다음 바이트를 읽는다.

    // 3) 읽기 도구를 닫는다.
    in.close();


  }

}
2) 1바이트를 읽는다.
=> read() 메서드의 리턴 타입이 int 라 하더라도 1바이트를 읽어 리턴한다.
=> 이유?
0 ~ 255까지의 값을 읽기 때문이다.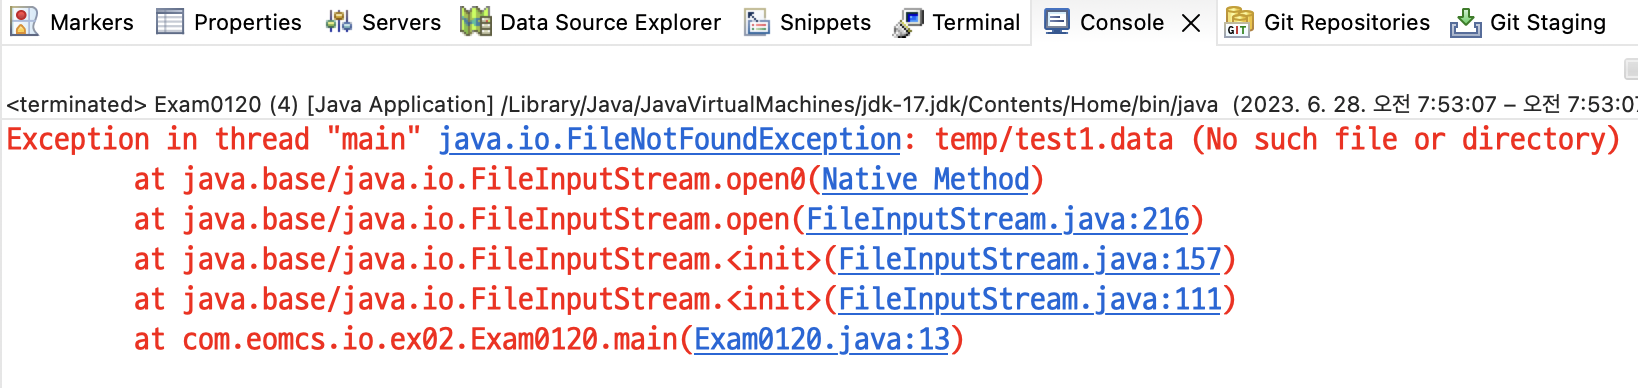
ㄴ 해당 경로에 파일이 존재하지 않으면 예외 발생

ㄴ 존재할 경우 출력
Exam0130.java
package com.eomcs.io.ex02;

import java.io.FileInputStream;

public class Exam0130 {

  public static void main(String[] args) throws Exception {
    FileInputStream in = new FileInputStream("temp/test1.data");

    // 반복문을 이용하여 여러 바이트를 읽는다.
    int b;
    //    while (true) {
    //      b = in.read();
    //      if (b == -1) // 파일의 끝에 도달하면 -1을 리턴한다.
    //        break;
    //      System.out.printf("%02x ", b);
    //    }

    while ((b = in.read()) != -1) {
      System.out.printf("%02x ", b);
    }

    in.close();
  }

}
ㄴ 데이터 파일의 바이트는 음수가 될 수 없음 => -1 이 리턴되면 파일의 끝이라는 의미
Byte Stream - 바이트 배열 출력하기
Exam0210.java
package com.eomcs.io.ex02;

import java.io.FileOutputStream;

public class Exam0210 {

  public static void main(String[] args) throws Exception {

    // 현재 디렉토리는 프로젝트 폴더이다.
    //
    FileOutputStream out = new FileOutputStream("temp/test1.data");

    byte[] bytes = {0x7a, 0x6b, 0x5c, 0x4d, 0x3e, 0x2f, 0x30};

    out.write(bytes); // 바이트 배열 전체를 출력한다.

    out.close();

    System.out.println("데이터 출력 완료!");

  }

}
write(byte[]) : 배열의 값 전체를 출력한다.
     write(byte[], 시작인덱스, 출력개수) : 시작 위치부터 지정된 개수를 출력한다.
Byte Stream - 바이트 배열 읽기
Exam0220.java
package com.eomcs.io.ex02;

import java.io.FileInputStream;

public class Exam0220 {

  public static void main(String[] args) throws Exception {

    FileInputStream in = new FileInputStream("temp/test1.data");

    // 바이트들을 저장할 배열을 넉넉히 준비한다.
    // => 이렇게 임시 데이터를 저장하기 위해 만든 바이트 배열을 보통 "버퍼(buffer)"라 한다.
    //
    byte[] buf = new byte[100];

    int count = in.read(buf);

    in.close();

    System.out.printf("읽은 바이트 수: %d\n", count);

    for (int i = 0; i < count; i++)
      System.out.printf("%02x ", buf[i]);

    System.out.println();
  }

}
read(byte[])
- 버퍼가 꽉 찰 때까지 읽는다.
- 물론 버퍼 크기보다 파일의 데이터가 적으면 파일을 모두 읽어 버퍼에 저장한다.
- 리턴 값은 읽은 바이트의 개수이다.
read(byte[], 저장할 위치, 저장하기를 희망하는 개수)
- 읽은 데이터를 "저장할 위치"에 지정된 방부터 개수만큼 저장한다.
- 리턴 값은 실제 읽은 바이트 개수이다.
Byte Stream - 바이트 배열의 특정 부분을 출력하기
Exam0310.java
package com.eomcs.io.ex02;

import java.io.FileOutputStream;

public class Exam0310 {

  public static void main(String[] args) throws Exception {
    FileOutputStream out = new FileOutputStream("temp/test1.data");

    byte[] bytes = {0x7a, 0x6b, 0x5c, 0x4d, 0x3e, 0x2f, 0x30};

    // write(byte[]) : 배열의 값 전체를 출력한다.
    // write(byte[], 시작인덱스, 출력개수) : 시작 위치부터 지정된 개수를 출력한다.
    //
    out.write(bytes, 2, 3); // 2번 데이터부터 3 바이트를 출력한다.

    out.close();

    System.out.println("데이터 출력 완료!");

  }

}
out.write(bytes, 2, 3); // 2번 데이터부터 3 바이트를 출력한다.
Byte Stream - 읽은 데이터를 바이트 배열의 특정 위치에 저장하기
Exam0320.java
package com.eomcs.io.ex02;
import java.io.FileInputStream;
public class Exam0320 {
public static void main(String[] args) throws Exception {
FileInputStream in = new FileInputStream("temp/test1.data");
// 데이터를 저장할 바이트 배열을 준비한다.
byte[] buf = new byte[100];
// 바이너리 데이터를 읽어 배열에 저장하기
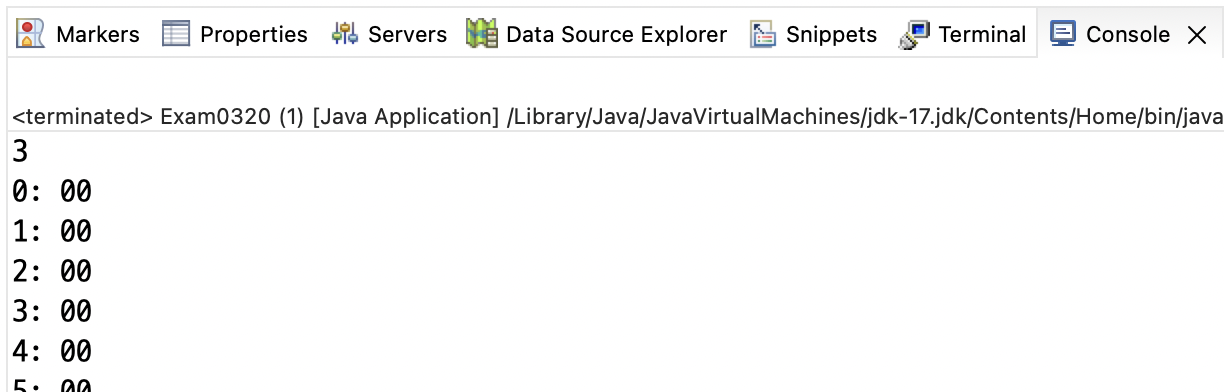
int count = in.read(buf, 10, 40); // 40바이트를 읽어 10번 방부터 저장한다.
in.close();
System.out.printf("%d\n", count);
for (int i = 0; i < 100; i++)
System.out.printf("%d: %02x \n", i, buf[i]);
System.out.println();
}
}
...
바이너리 데이터를 읽어 배열에 저장하기
   read(byte[])
     => 읽은 데이터를 바이트 배열에 채운다.
     => 리턴 값은 읽은 바이트 수이다.
   read(byte[], 저장할 위치, 저장하기를 희망하는 개수)
     => 읽은 데이터를 "저장할 위치"에 지정된 방부터 개수만큼 저장한다.
     => 리턴 값은 실제 읽은 바이트 개수이다.
FileInputStream 활용 - JPEG 파일 읽기
Exam0410.java
package com.eomcs.io.ex02;
import java.io.File;
import java.io.FileInputStream;
public class Exam0410 {
public static void main(String[] args) throws Exception {
// 1) 파일 정보를 준비한다.
File file = new File("sample/photo1.jpg");
// 2) 파일을 읽을 도구를 준비한다.
FileInputStream in = new FileInputStream(file);
// => SOI(Start of Image) Segment 읽기: 2바이트
int b1 = in.read(); // 00 00 00 ff
int b2 = in.read(); // 00 00 00 d8
int soi = b1 << 8 | b2;
// 00 00 00 ff <== b1
// 00 00 ff 00 <== b1 << 8
// | 00 00 00 d8 <== b2
// ------------------
// 00 00 ff d8
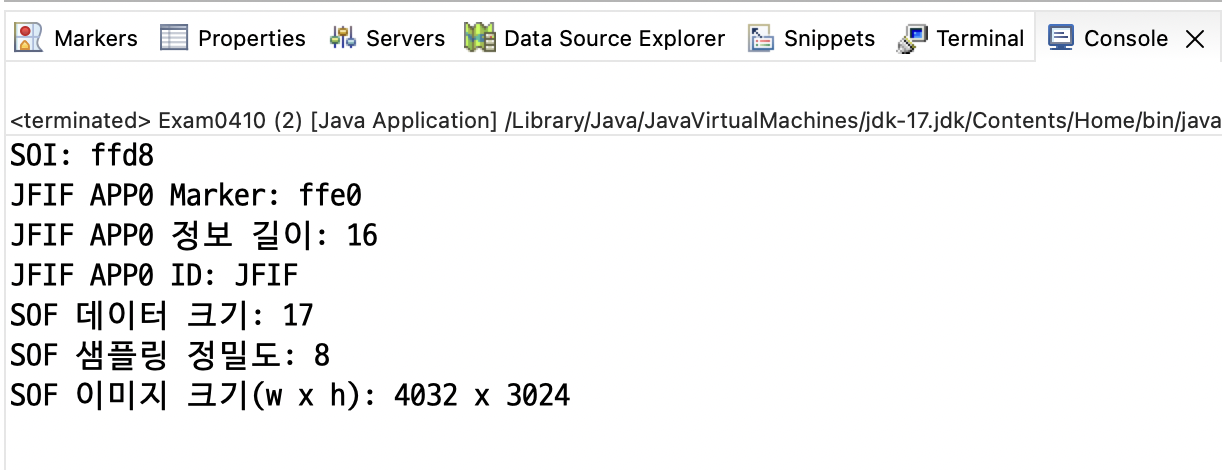
System.out.printf("SOI: %x\n", soi);
// => JFIF-APP0 Segment Marker 읽기: 2바이트
int jfifApp0Marker = in.read() << 8 | in.read();
System.out.printf("JFIF APP0 Marker: %x\n", jfifApp0Marker);
// => JFIF-APP0 Length: 2바이트
int jfifApp0Length = in.read() << 8 | in.read();
System.out.printf("JFIF APP0 정보 길이: %d\n", jfifApp0Length);
// => JFIF-APP0 정보: 16바이트(위에서 알아낸 길이)
byte[] jfifApp0Info = new byte[jfifApp0Length];
in.read(jfifApp0Info);
// => JFIF-APP0 Identifier: 5바이트
String jfifApp0Id = new String(jfifApp0Info, 0, 4);
System.out.printf("JFIF APP0 ID: %s\n", jfifApp0Id);
// SOF0(Start of Frame) 정보 읽기
// - 그림 이미지의 크기 및 샘플링에 관한 정보를 보관하고 있다
// - 0xFFC0 ~ 0xFFC2 로 표시한다.
// => SOF Marker 찾기
int b;
while (true) {
b = in.read();
if (b == -1) { // 파일 끝에 도달
break;
}
if (b == 0xFF) {
b = in.read();
if (b == -1) { // 파일 끝에 도달
break;
}
if (b >= 0xC0 && b <= 0xC2) {
break;
}
}
}
if (b == -1) {
System.out.println("유효한 JPEG 파일이 아닙니다.");
return;
}
// => SOF Length 읽기: 2바이트
int sofLength = in.read() << 9 | in.read();
System.out.printf("SOF 데이터 크기: %d\n", sofLength);
// => SOF 데이터 읽기: 17바이트(위에서 알아낸 크기)
byte[] sofData = new byte[sofLength];
in.read(sofData);
// => SOF 샘플링 정밀도: 1바이트
System.out.printf("SOF 샘플링 정밀도: %d\n", sofData[0]);
// => SOF 이미지 높이: 2바이트
int height = ((sofData[1] << 8) & 0xff00) | (sofData[2] & 0xff);
// => SOF 이미지 너비: 2바이트
int width = ((sofData[3] << 8) & 0xff00) | (sofData[4] & 0xff);
System.out.printf("SOF 이미지 크기(w x h): %d x %d\n", width, height);
// 3) 읽기 도구를 닫는다.
in.close();
}
}
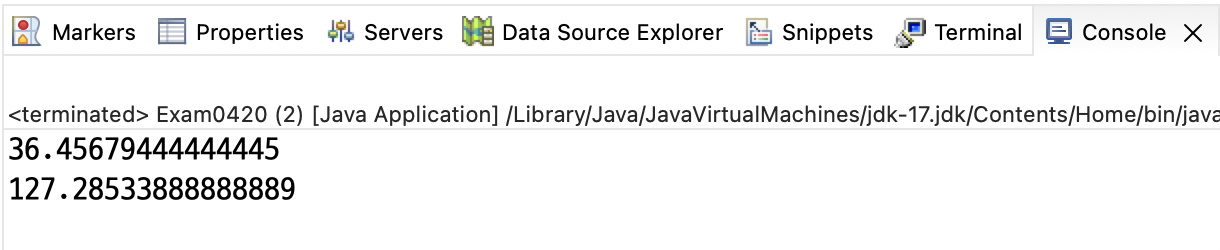
FileInputStream 활용 - JPEG 파일 읽기 : 위도/경도 알아내기
Exam0420.java
package com.eomcs.io.ex02;

import java.io.File;
import com.drew.imaging.ImageMetadataReader;
import com.drew.metadata.Metadata;
import com.drew.metadata.exif.GpsDirectory;

public class Exam0420 {

  public static void main(String[] args) throws Exception {

    // 1) 파일 정보를 준비한다.
    File file = new File("sample/gps-test.jpeg");

    Metadata metadata = ImageMetadataReader.readMetadata(file);
    GpsDirectory gpsDirectory = metadata.getFirstDirectoryOfType(GpsDirectory.class);
    if (gpsDirectory != null) {
      // 사진 파일에 GPS 정보가 있을 경우,
      System.out.println(gpsDirectory.getGeoLocation().getLatitude());
      System.out.println(gpsDirectory.getGeoLocation().getLongitude());
    }
  }

}