코드블럭 테마를 변경해보기로 했다.
1. 코드블럭 테마 변경하기 - highlight 적용
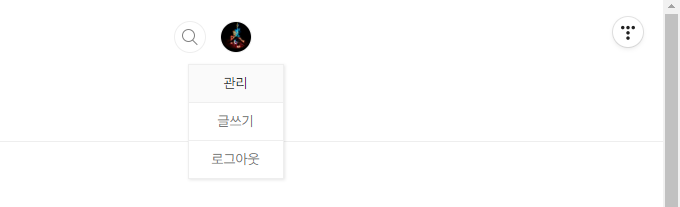
1) 프로필 위치에서 [관리]를 선택한다.
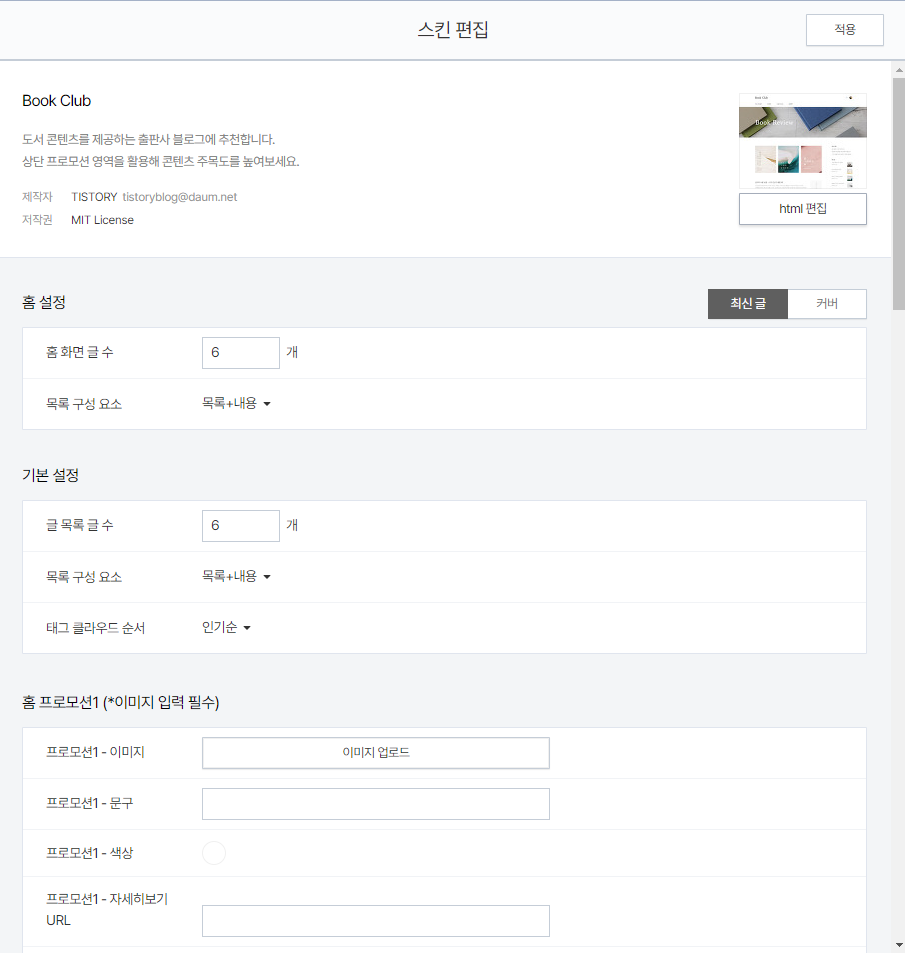
2) 꾸미기 > 스킨 편집을 선택한다.

3) [html 편집] 버튼을 선택한다.
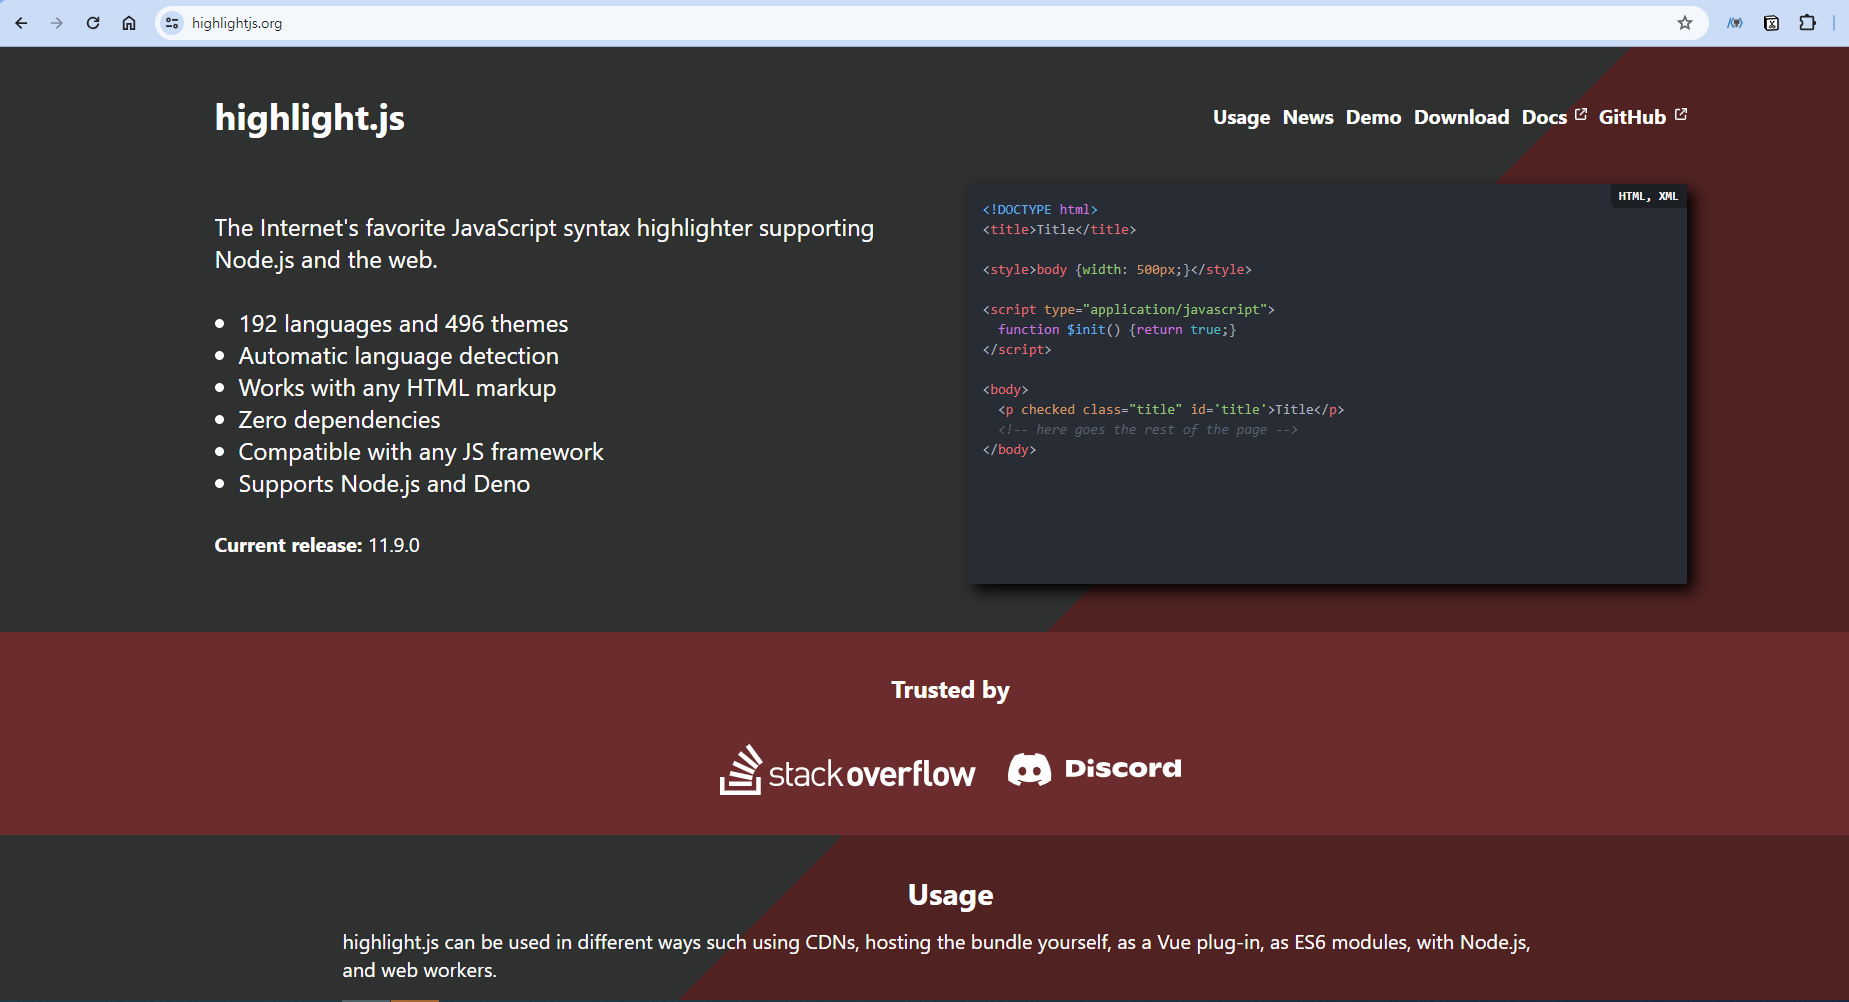
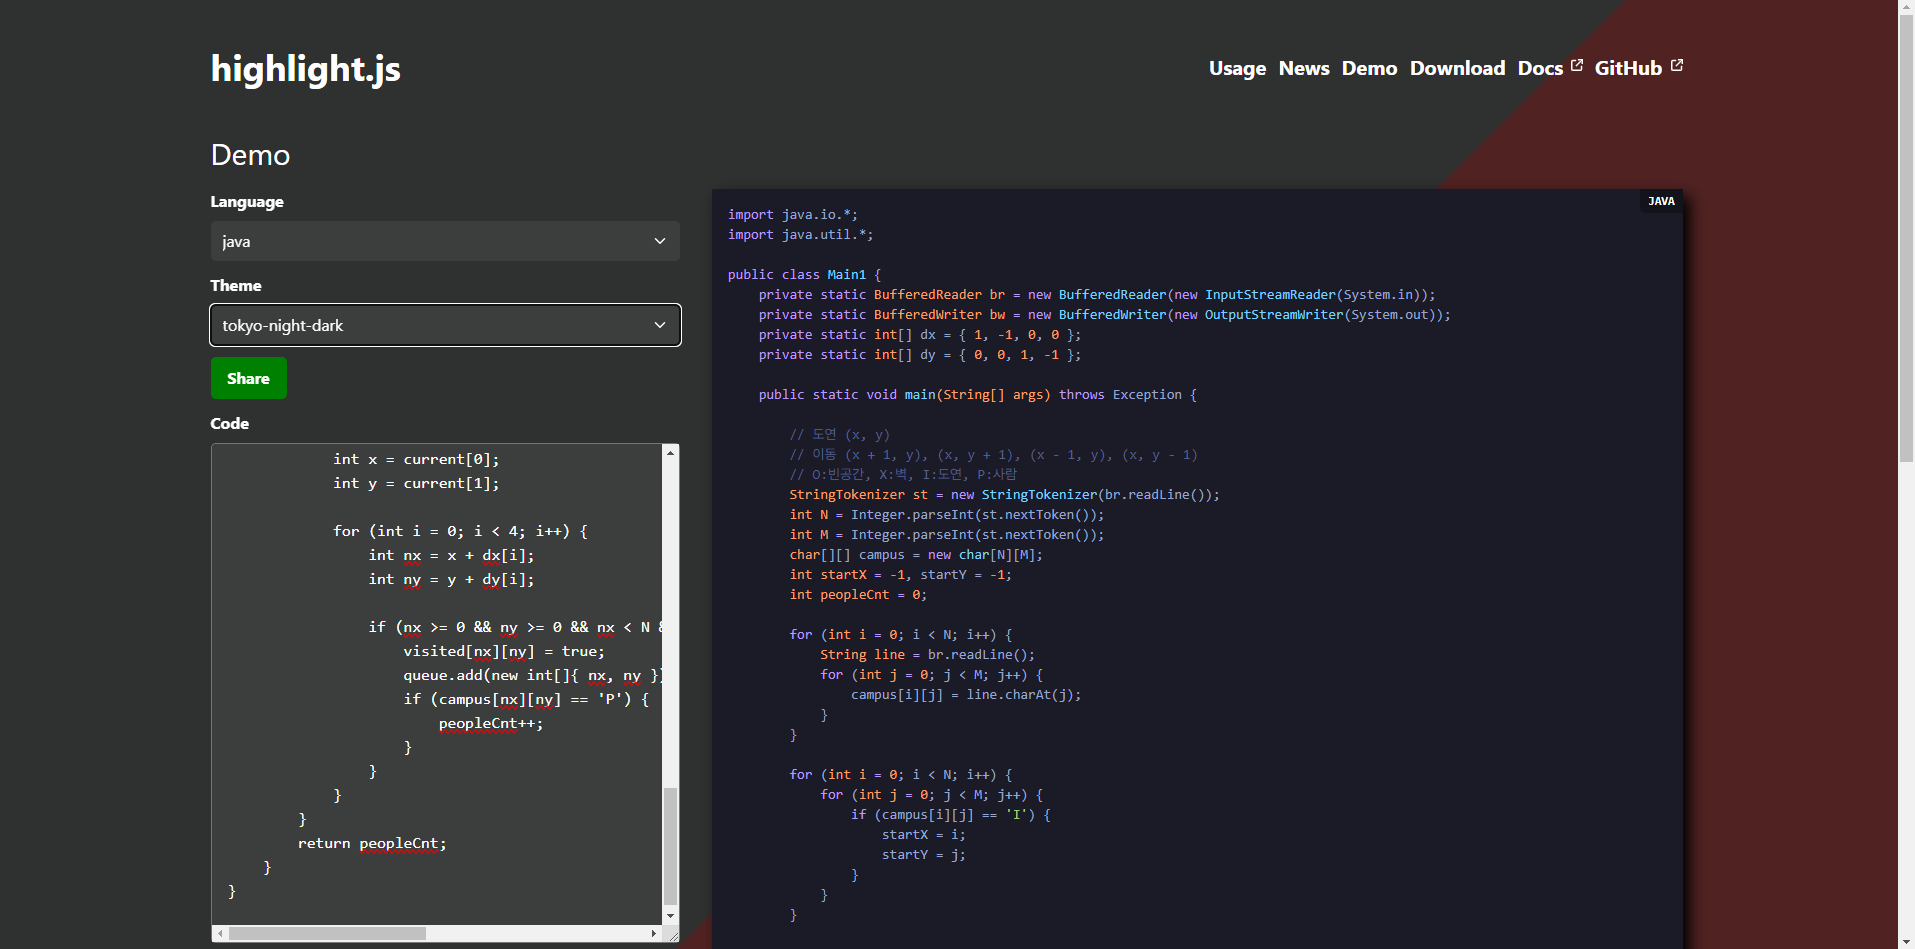
4) 'Highlight.js' 사이트로 들어가서 Download 탭을 클릭한다.
highlight.js
Usage highlight.js can be used in different ways such using CDNs, hosting the bundle yourself, as a Vue plug-in, as ES6 modules, with Node.js, and web workers. See our README on GitHub for more details. As a Module Highlight.js can be used with Node on the
highlightjs.org
5) Common을 체크한 후 [Download]를 선택한다. (기본적으로 많이쓰는 것들로 이루어진 것으로 보임)

6) Download 받은 highlight.zip 파일의 압축을 풀어준다.

7) 파일업로드 탭을 선택 > [+추가] 버튼을 선택 > highlight.min.js 파일과 설정하고 싶은 스타일의 css 파일을 추가 > [적용]을 선택
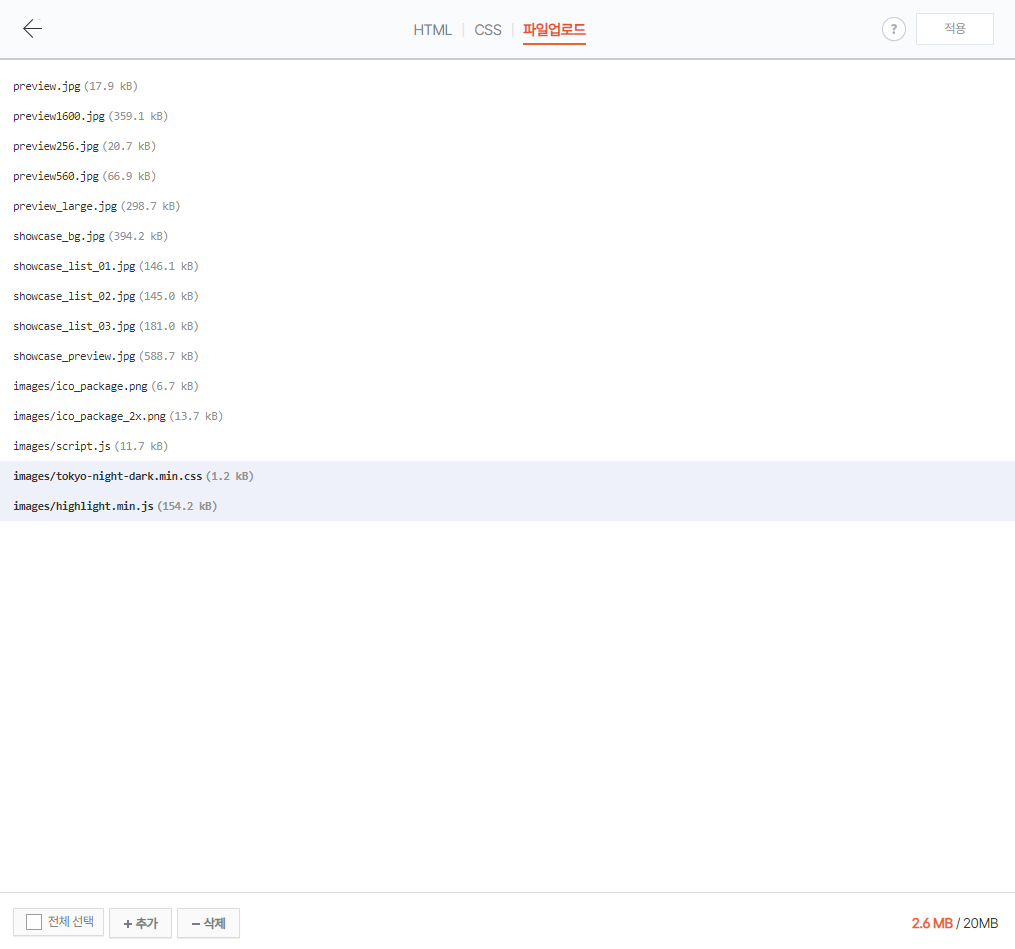
ㄴ 참고로 css 파일은 highlight > styles에 존재한다.
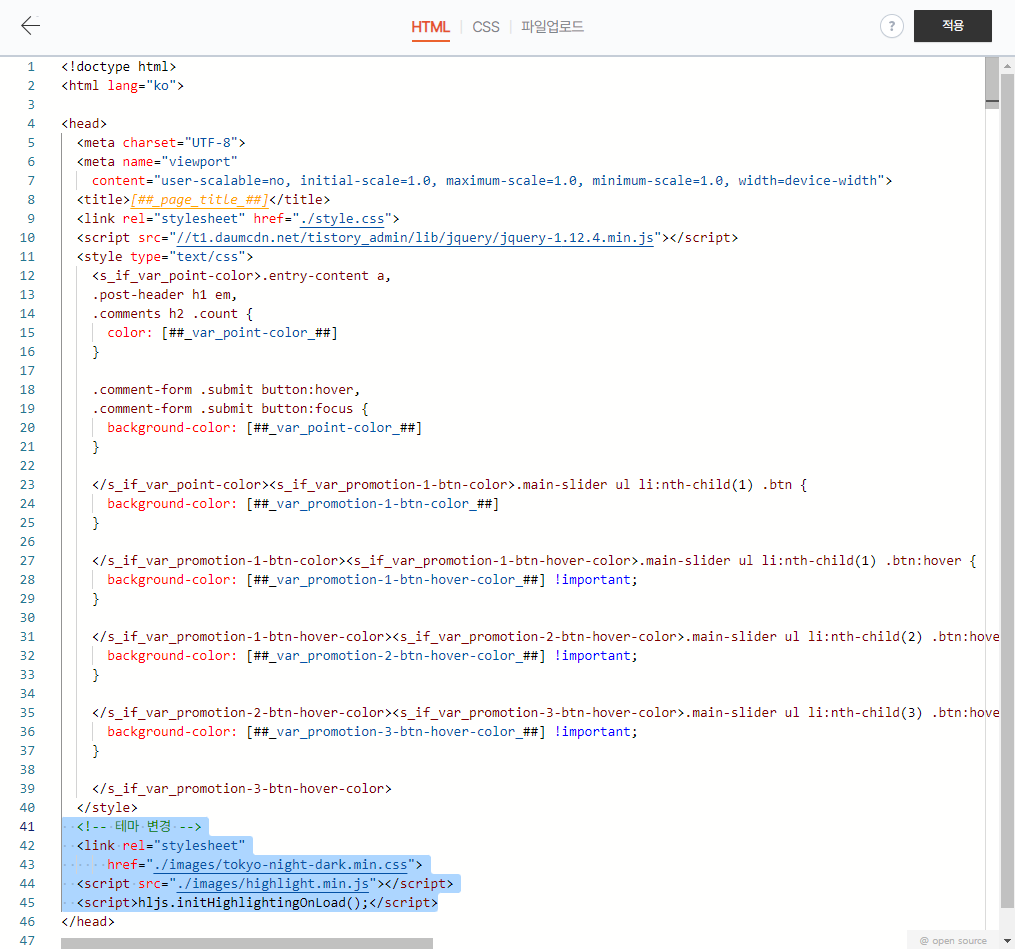
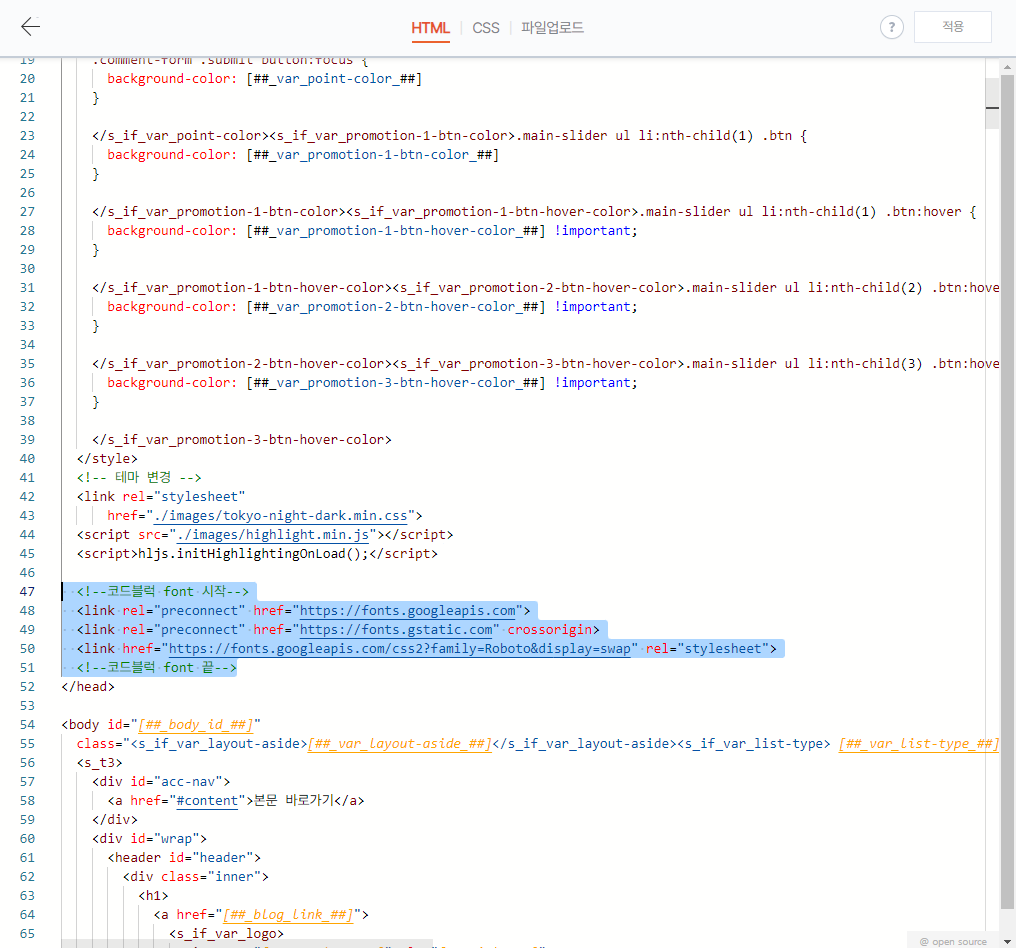
8) HTML 탭의 </head> 위쪽에 아래 코드를 추가해준다.
  <!-- 테마 변경 -->
  <link rel="stylesheet"
      href="./images/테마이름.css">
  <script src="./images/highlight.min.js"></script>
  <script>hljs.initHighlightingOnLoad();</script>
=>
** 참고) 코드 스타일을 확인하고 싶으면 Demo탭을 선택한 후 Language와 Theme을 선택 후 Code 영역에 코드를 입력한 후 확인하면 된다.
2. 코드블럭 '열기&닫기 버튼' 적용 방법
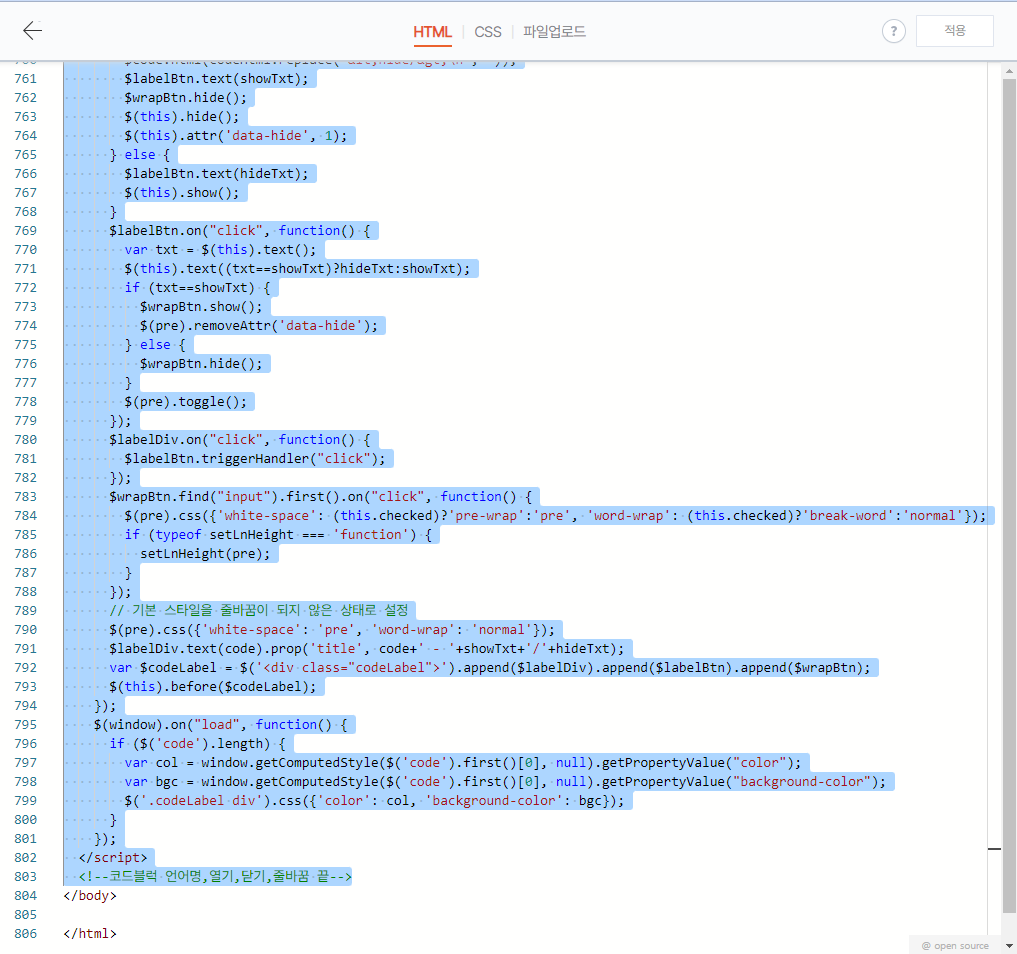
1) 위쪽에서 실행한 1~3를 동일하게 실행한 후, html 탭에서 아래 코드를 </body> 위쪽에 삽입해준다.
<!--코드블럭 언어명,열기,닫기,줄바꿈 시작-->
<style>
.codeLabel {
position: relative;
margin: 10px 0 0;
}
.codeLabel * {
user-select: none;
cursor: pointer;
font-size: 13px;
}
.codeLabel > div {
display: inline-block;
color: #ccc;
text-transform: uppercase;
background-color: #282c34;
padding: 6px 10px;
}
.codeLabel span {
color: #555;
margin: 0 0 0 10px;
}
.codeLabel span ~ label {
position: absolute;
right: 0;
top: 6px;
}
.codeLabel span ~ label input {
height: auto !important;
padding: 0 !important;
margin: 0 !important;
}
pre[data-ke-type='codeblock'] {
margin: -4.5px 0 0 -1px; /* 음수 마진으로 간격 제거 */
padding: 0; /* 모든 패딩 제거 */
line-height: 1.2; /* 줄 간격 조정 */
}
</style>
<script>
$("pre[data-ke-type='codeblock']").each(function() {
var showTxt = "열기", hideTxt = "닫기", pre = this;
var code = this.dataset.keLanguage;
var $labelDiv = $("<div>");
var $labelBtn = $("<span>");
var $wrapBtn = $("<label><input type='checkbox'> 줄바꿈</label>");
var $code = $(this).find("code").first();
var codeHtml = $code.html();
if (codeHtml.search('<hide/>\n') > -1 || pre.dataset.hide) {
$code.html(codeHtml.replace('<hide/>\n',''));
$labelBtn.text(showTxt);
$wrapBtn.hide();
$(this).hide();
$(this).attr('data-hide', 1);
} else {
$labelBtn.text(hideTxt);
$(this).show();
}
$labelBtn.on("click", function() {
var txt = $(this).text();
$(this).text((txt==showTxt)?hideTxt:showTxt);
if (txt==showTxt) {
$wrapBtn.show();
$(pre).removeAttr('data-hide');
} else {
$wrapBtn.hide();
}
$(pre).toggle();
});
$labelDiv.on("click", function() {
$labelBtn.triggerHandler("click");
});
$wrapBtn.find("input").first().on("click", function() {
$(pre).css({'white-space': (this.checked)?'pre-wrap':'pre', 'word-wrap': (this.checked)?'break-word':'normal'});
if (typeof setLnHeight === 'function') {
setLnHeight(pre);
}
});
// 기본 스타일을 줄바꿈이 되지 않은 상태로 설정
$(pre).css({'white-space': 'pre', 'word-wrap': 'normal'});
$labelDiv.text(code).prop('title', code+' - '+showTxt+'/'+hideTxt);
var $codeLabel = $('<div class="codeLabel">').append($labelDiv).append($labelBtn).append($wrapBtn);
$(this).before($codeLabel);
});
$(window).on("load", function() {
if ($('code').length) {
var col = window.getComputedStyle($('code').first()[0], null).getPropertyValue("color");
var bgc = window.getComputedStyle($('code').first()[0], null).getPropertyValue("background-color");
$('.codeLabel div').css({'color': col, 'background-color': bgc});
}
});
</script>
<!--코드블럭 언어명,열기,닫기,줄바꿈 끝-->=>
2) 그러면, 아래와 같이 언어명, 닫기, ㅁ줄바꿈이 노출된다.
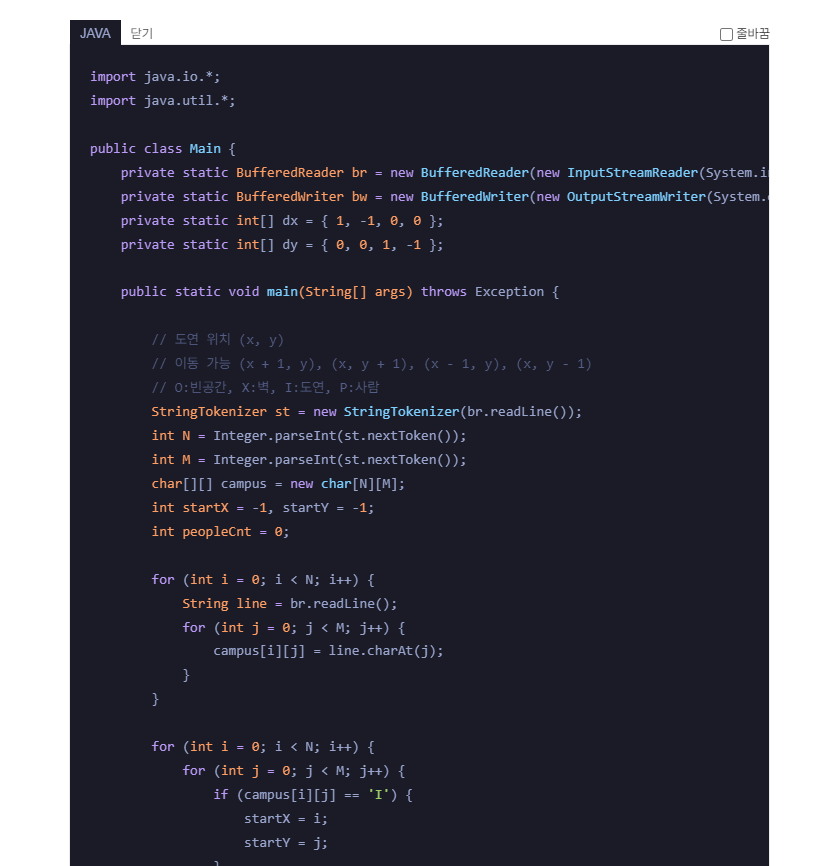
ㄴ [닫기] 버튼 쪽을 선택하면, 아래와 같이 코드블럭이 숨겨지면서 [열기] 버튼이 노출된다.
=>

3. 코드블럭 폰트 변경
첫 번째 방법
- 구글 폰트 이용하기
https://fonts.google.com/
Browse Fonts - Google Fonts
Making the web more beautiful, fast, and open through great typography
fonts.google.com
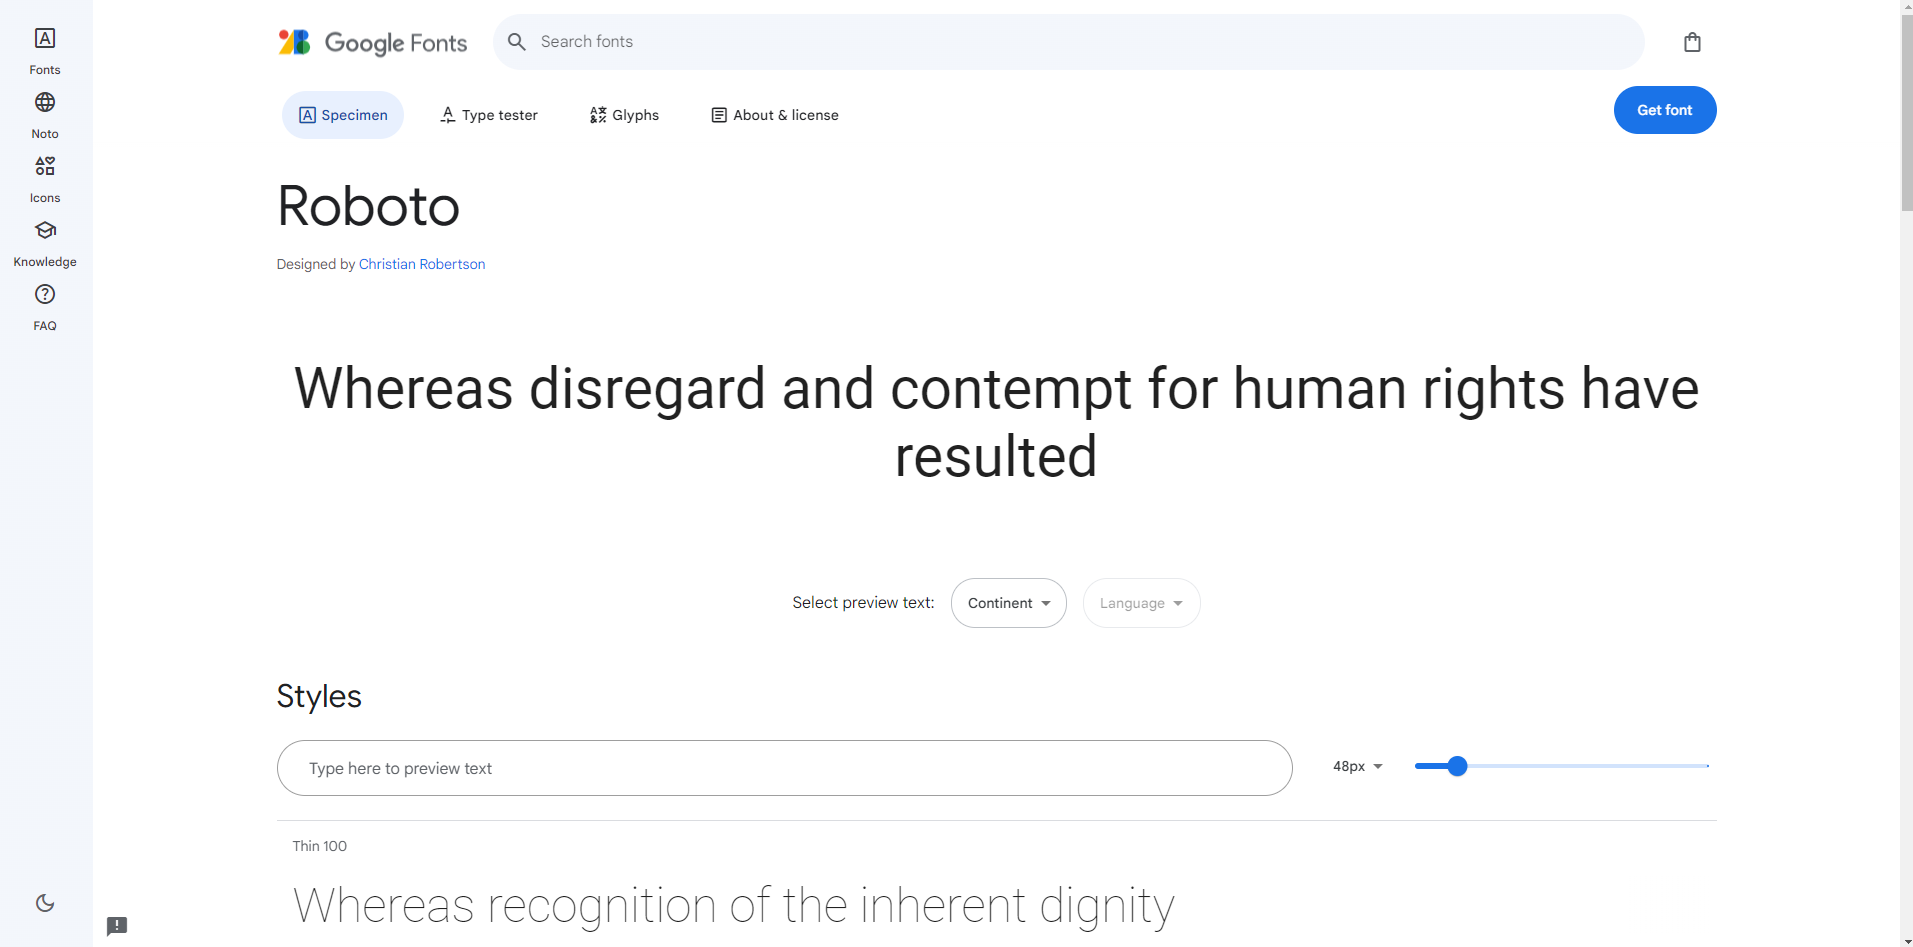
1) 사용하고 싶은 폰트를 선택(검색가능)한다.
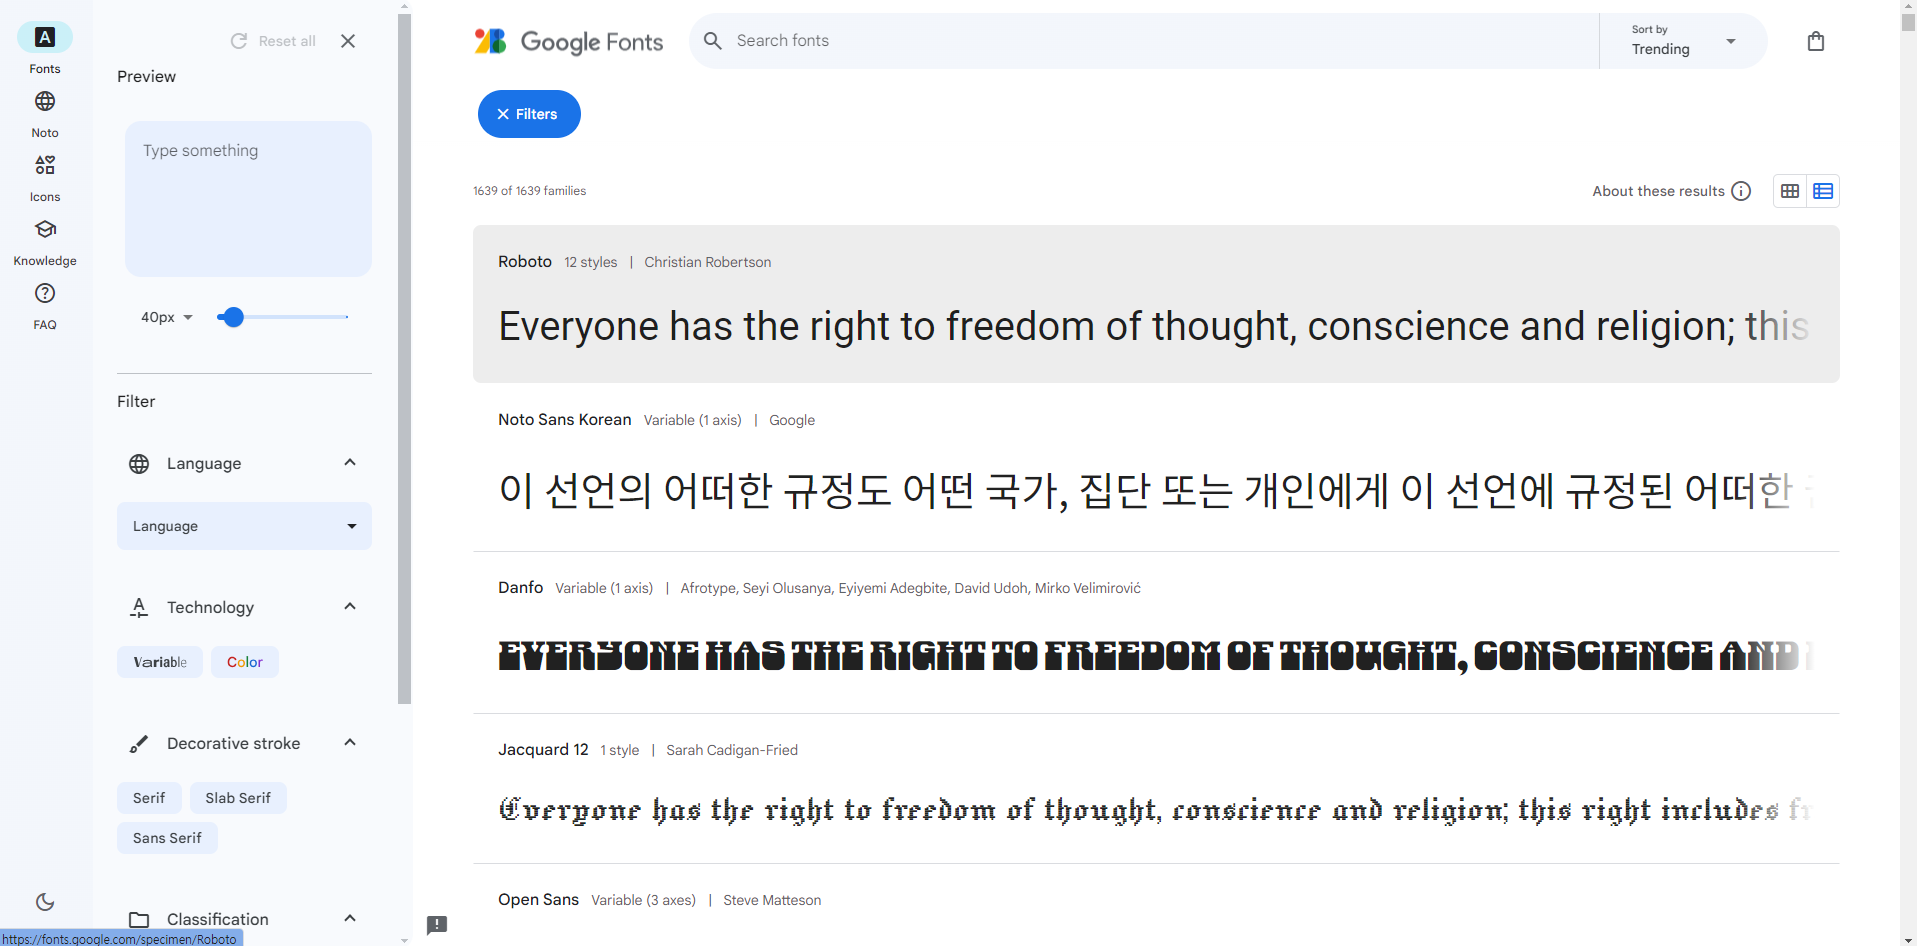
2) [Get font] 버튼을 선택한다.
3) [Get embed code] 버튼을 선택한다.
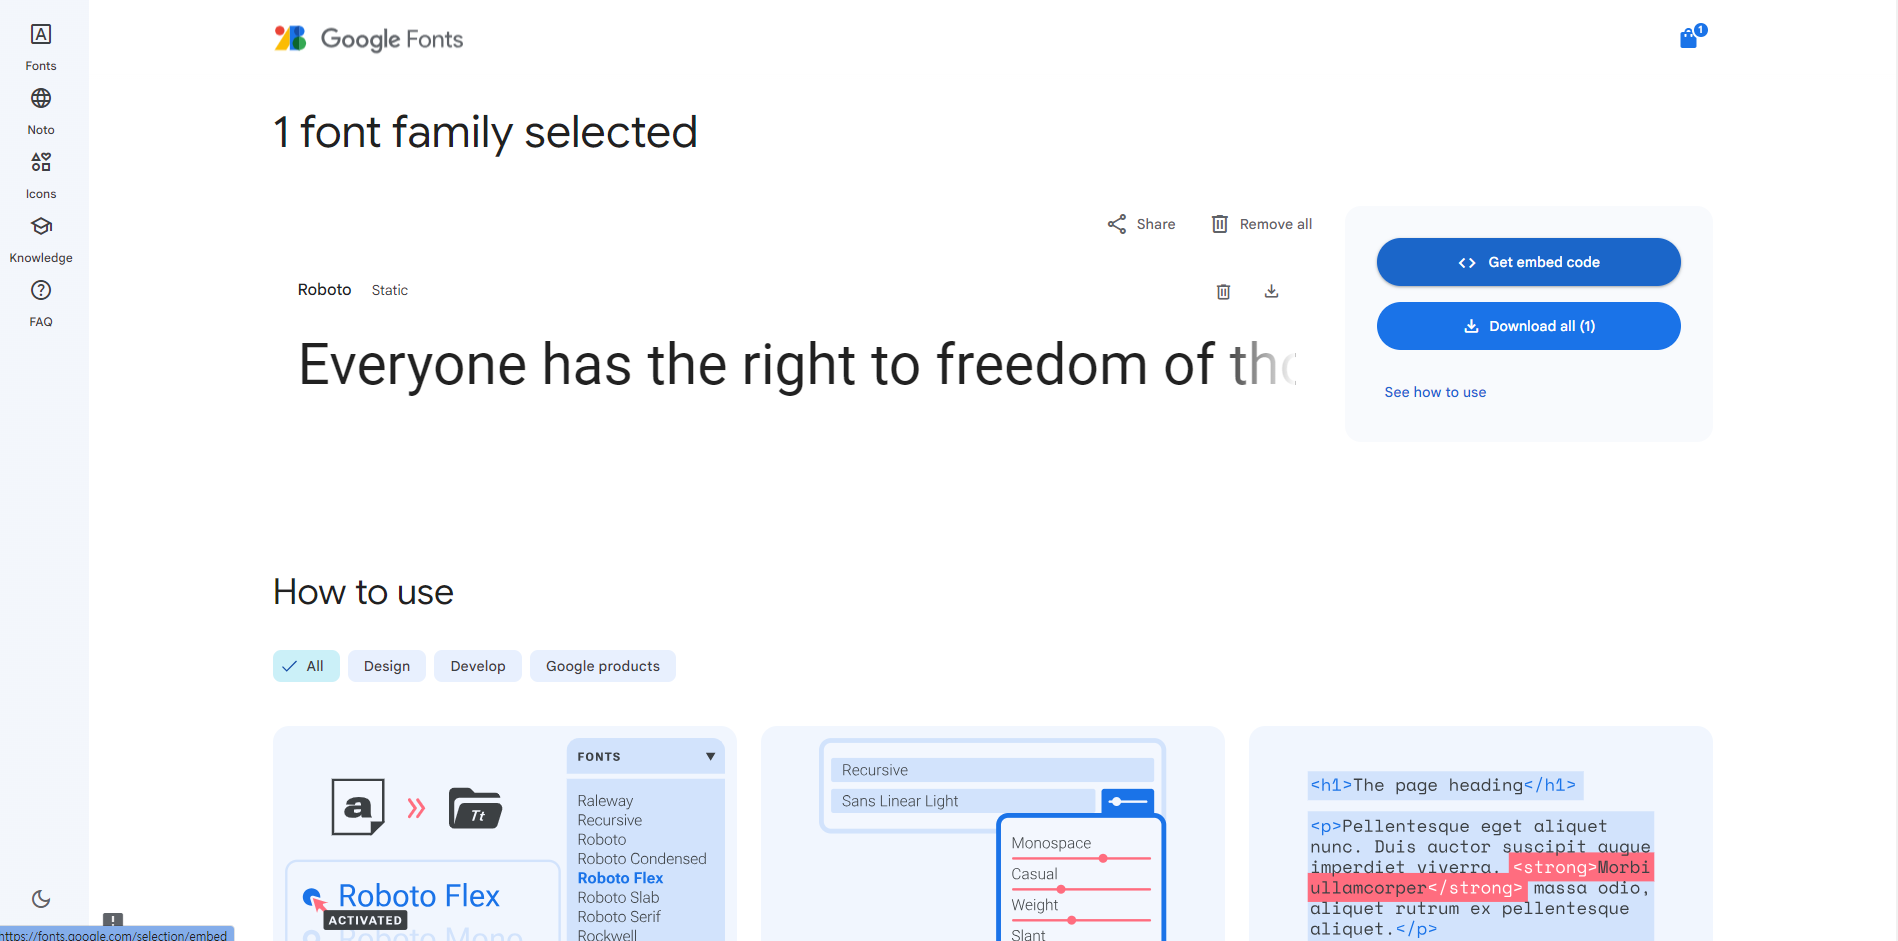
4) 원하는 속성만 선택한 뒤 Embed code in the <head> of your html 영역과 Roboto: CSS class(폰트마다 이름 다름) 영역의 코드를 복사한다.
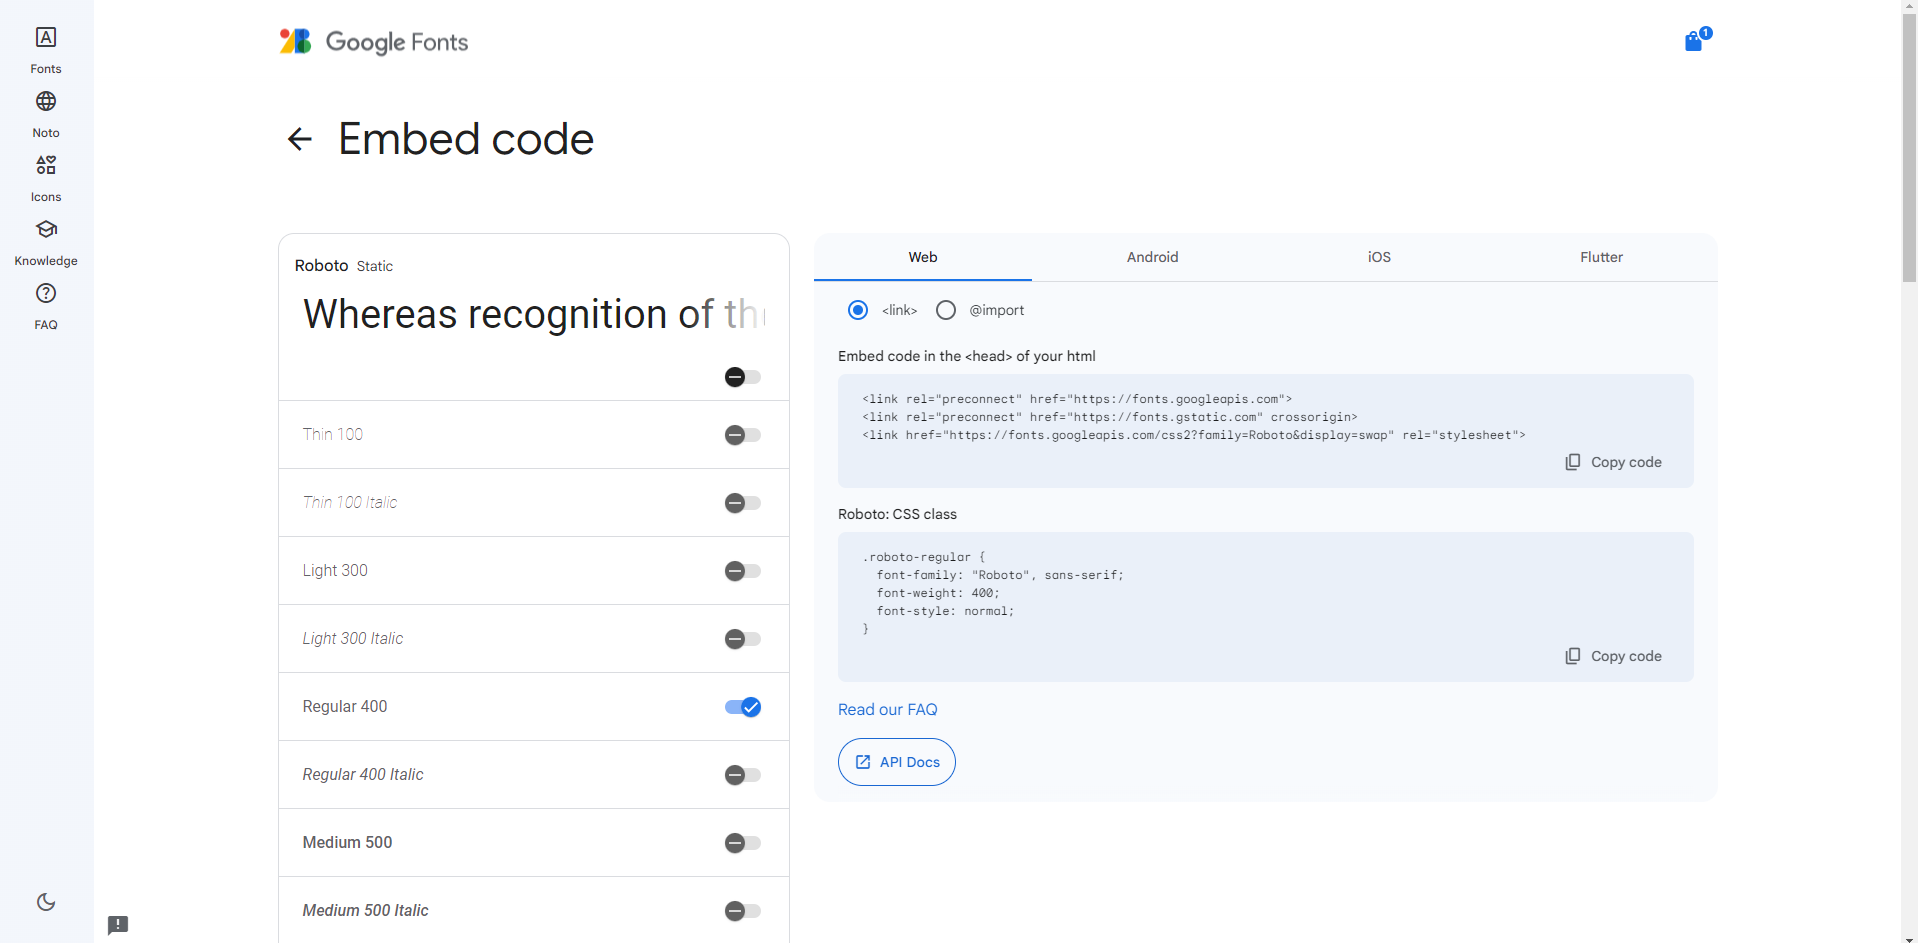
5) html탭에서 </head> 위쪽으로 Embed code in the <head> of your html 영역에서 복사한 코드를 붙여넣는다.
  <!--코드블럭 font 시작-->
  <link rel="preconnect" href="https://fonts.googleapis.com">
  <link rel="preconnect" href="https://fonts.gstatic.com" crossorigin>
  <link href="https://fonts.googleapis.com/css2?family=Roboto&display=swap" rel="stylesheet">
  <!--코드블럭 font 끝-->
=>
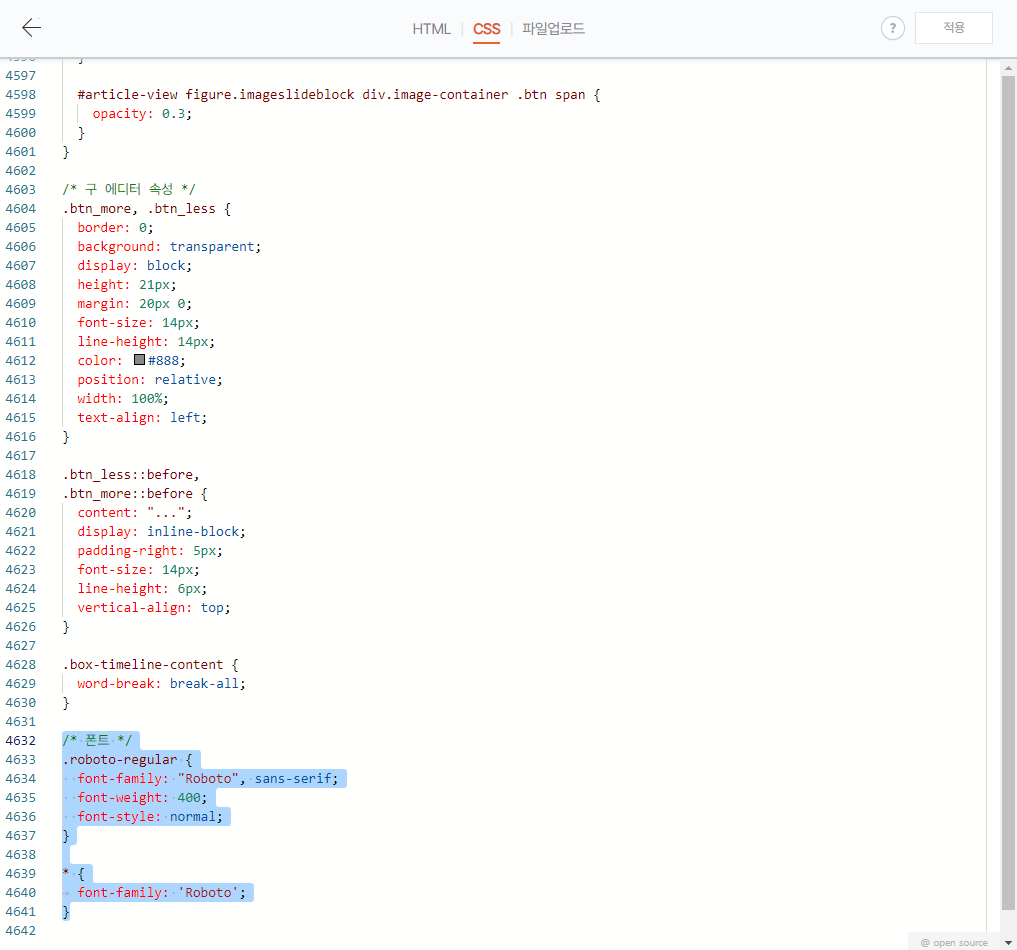
6) CSS탭에서 맨 아래 위치에 Roboto: CSS class(폰트마다 이름 다름) 영역에서 복사한 코드+아래 코드를 붙여넣는다.
* {
	font-family: 'Roboto';
}
=>
/* 폰트 */
.roboto-regular {
  font-family: "Roboto", sans-serif;
  font-weight: 400;
  font-style: normal;
}

* {
	font-family: 'Roboto';
}
=>
7) [적용]을 선택하여 폰트 스타일을 적용시킨다.
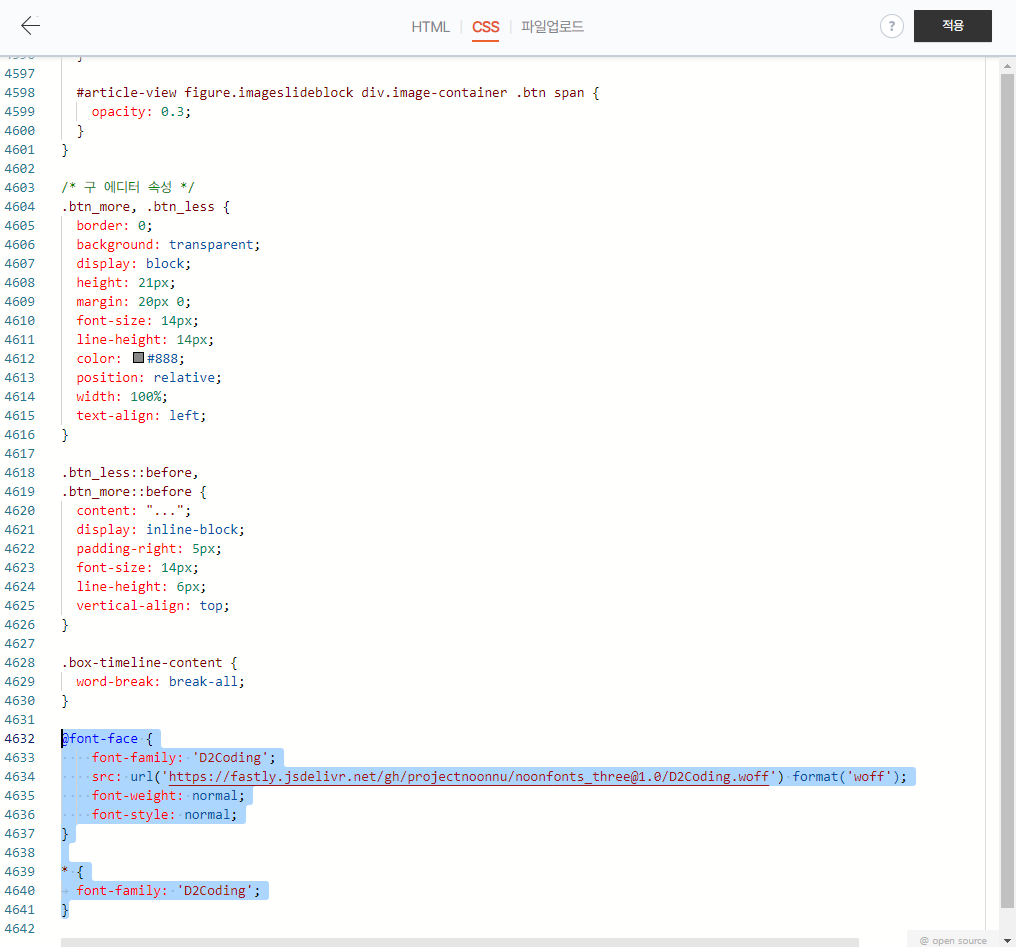
두 번째 방법
- 눈누 사이트 이용하기
눈누
상업용 무료한글폰트 사이트
noonnu.cc
1) 사용하고 싶은 폰트를 검색한 후 웹폰트로 사용 영역의 코드를 복사한다.

2) css 탭에서 맨 아래 위치에 복사한 코드 + 아래 코드 추가
* {
	font-family: 'D2Coding'; // 폰트 이름
}
=>
@font-face {
    font-family: 'D2Coding';
    src: url('https://fastly.jsdelivr.net/gh/projectnoonnu/noonfonts_three@1.0/D2Coding.woff') format('woff');
    font-weight: normal;
    font-style: normal;
}

* {
	font-family: 'D2Coding';
}
=>
'★꿀팁★' 카테고리의 다른 글
| [Tip] Scouter Client&Server 설치 (3) | 2024.05.29 |
|---|---|
| [Tip] Scouter 설치 전 세팅 (0) | 2024.05.29 |
| [네이버 클라우드] NCE 자격증 공부 방법 및 후기 (33) | 2023.12.23 |
| [네이버 클라우드] NCP 자격증 공부 방법 및 후기 (0) | 2023.12.12 |


